built for Hal Hudgins
May 2007
Quote from Hal: "This thing's still costing me money. I just ordered 14 jazz albums from Amazon."
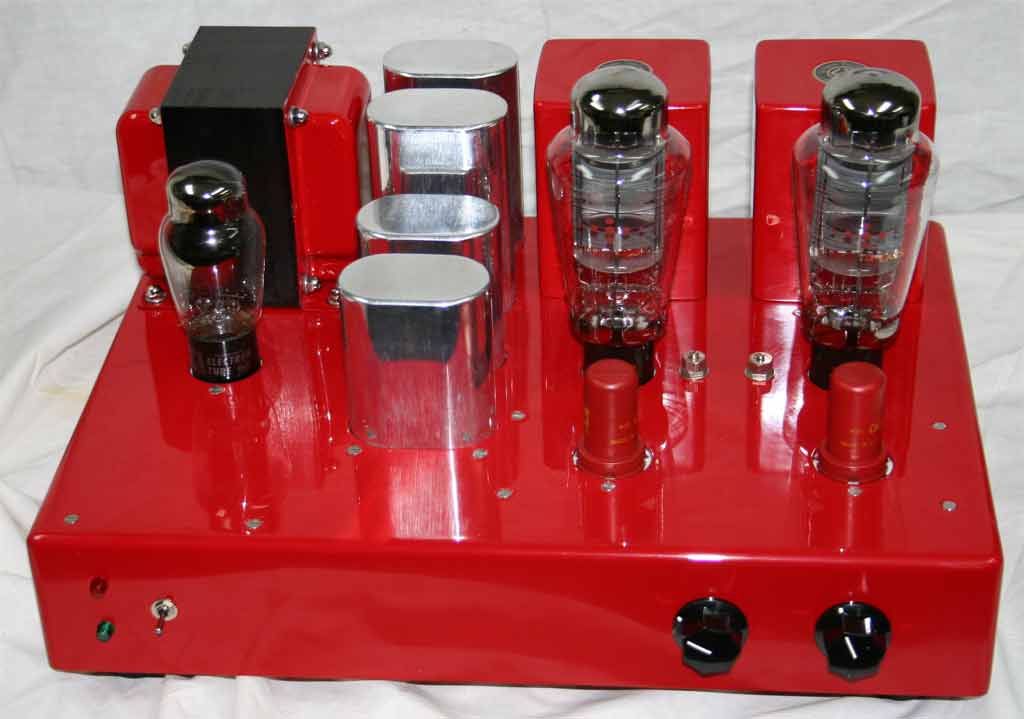
Here's my latest project, another 300B amp based on the WE91A
theater amplifier from the 1930s.
This one uses Hashimoto output transformers. The Hashimotos are made by
the transformer company that
built Sansui transformers in the 1960s. They are very well-regarded.
The power transformer is a Hammond unit, rated at 400-0-400
at 465mA. It weighs in at about 12 pounds. I have used
these power
transformers for years and they always perform well. The power supply
is filtered by 50uF 440VAC motor run capacitors
paralleled with a 100/100uF at 500V JJ electrolytic. I polish the
aluminum cases of the motor run caps for
appearance purposes. The output tubes are Emission Labs 300Bs,
very nice, well built tubes. Get yours from
TubesUSA.com. The rectifier is a NOS RCA 5Z3. In the years
I've been using them, I have had only one failure, an open filament.
The driver tubes are NOS 5693s, a special version of the 6SJ7 pentode.
The B+ on the first cap is about 450VDC and there's 440VDC on the
plates of the
300Bs. They bias at 71VDC on the cathodes, just under 30
watts plate dissipation, fairly conservative for this tube.
Here's a few more shots for your viewing pleasure.
Here's a shot of the chassis with the main parts mounted in a mock-up
before painting. The chassis is made from 1/8" aluminum plate
welded in the corners and contoured for a nice smooth look. I sourced
it through TubesUSA.com, the
same place
I got the 300Bs. It's a bit larger than I've used in the past at 12" x
17" x 3" and it has a recessed bottom cover.
The aluminum, even though it's soft, is difficult to machine because
the metal spalls under drill bits and cutters
and instantly dulls the cutting edges. I had to use a special lubricant
that I got from a welding supply store. The thick chassis
allowed me to countersink the exposed fasteners which are all stainless
steel. I had a machine shop cut the
oval holes for me on a milling machine. I don't have anything accurate
enough to machine cut them and
I don't want to take the time to hand-cut them.
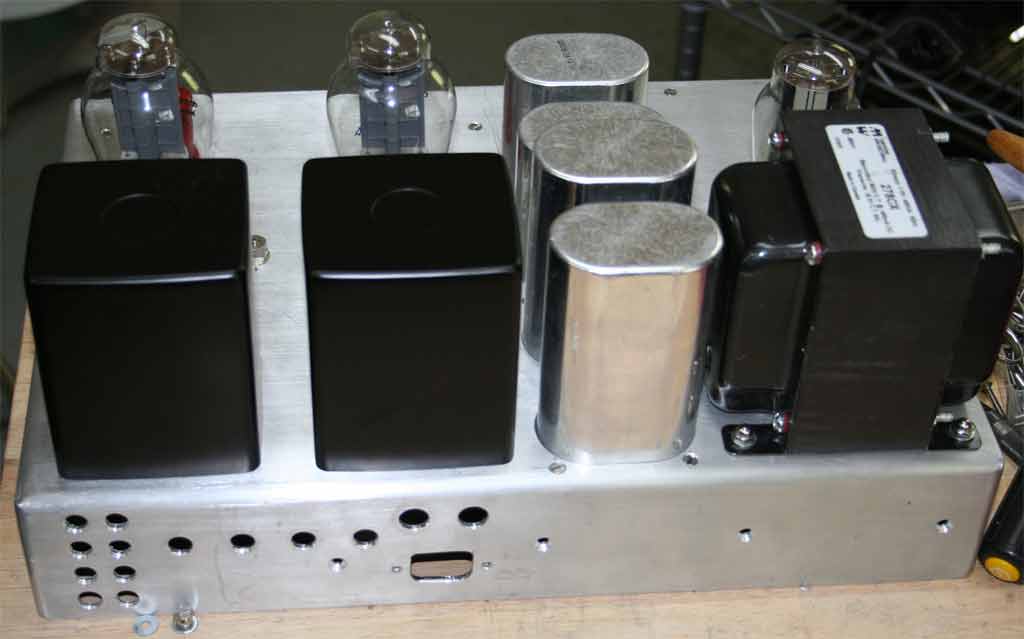
Here's a shot of the rear of the chassis before painting I mounted
all of the major components to be sure that all the holes were in
their correct locations. The output transformers were painted with a
thin coat of satin black and the Hammond Power transformer has a
nasty varnish-dipped finish that has to be stripped.
The holes were all cut with regular drill bits, unibits and a dremel
tool. My small drill press won't reach everywhere, so some of the holes
are
cut with a hand drill. It's easy with unibits. All of the countersinks
are made with a hand drill and countersink bit.
The entire chassis was hand-sanded with 600 grit wet paper to remove
all tool marks. All of the larger holes were hand worked
with a deburring tool to clean and slightly bevel the openings.
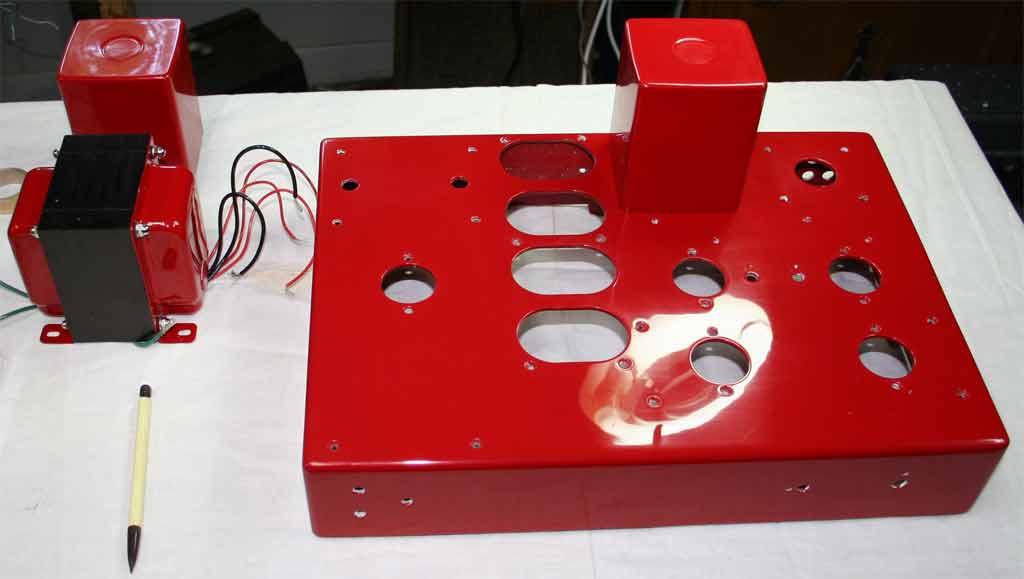
Here's the chassis after painting. Let me say that the painting of
this amp was a real project! It's finished with automotive
paint, base coat and clear coat system. The aluminum parts were first
painted with an etching primer to insure that the subsequent
coats would adhere. Next everything is coated with a two-part
undercoating sprayed with a quart-size spray gun and a small
compressor. After light sanding with 600 grit wet sandpaper, the color
coat is sprayed on. I thinned it with the special reducer and
shot four or five light coats on all surfaces. I'm not such a good
painter and no matter how I tried, I couldn't get the clear
coat applied without getting "orange peel" in the finish. I had to
apply a heavy coat of clear coat (which is a two-part epoxy coating)
and sand the entire thing to remove the uneven finish. I start with 600
grit wet paper and progress through 1000 grit, 2000 grit
and 3000 grit before using rubbing compound and polishing compound to
bring the shine back. It's a *lot* of rubbing! The whole thing
gets a coat of automotive wax to protect the finish. The epoxy clear
coat dries quickly and is very hard after 24 hours. It's much
more difficult to sand than the lacquer I have used in the past. Next
time, the auto body repair shop gets my painting business.
Normally I have the metal parts powder coated, but since I'm using
potted transformers which can't take the heat
of powder coating, I decided to paint the whole thing. My cost for the
paint and primers was $175. This stuff ain't cheap!
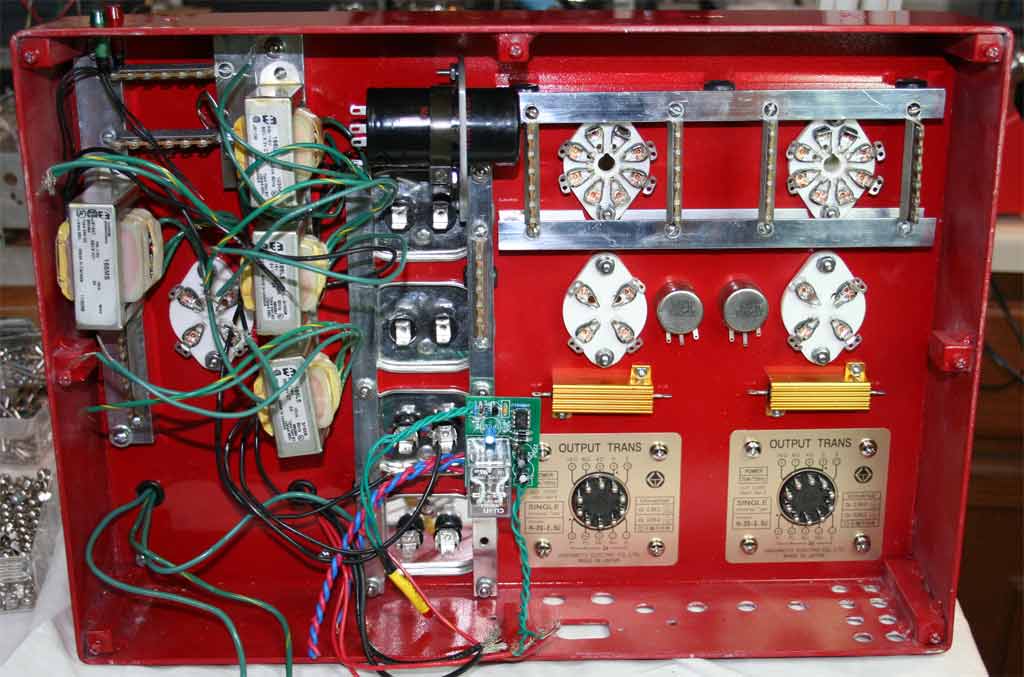
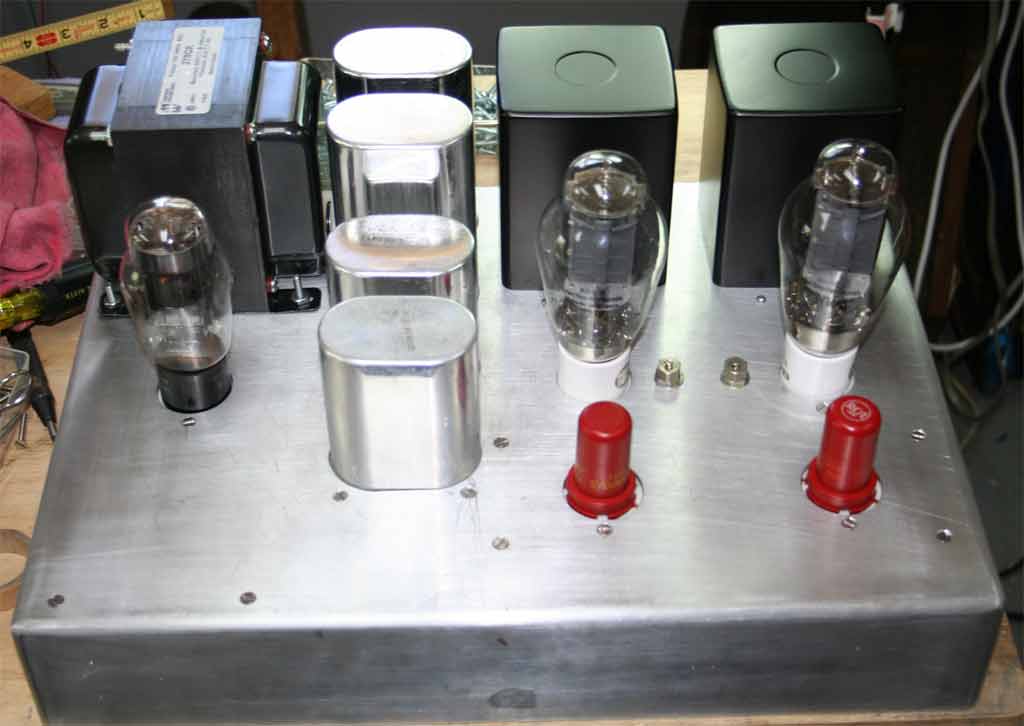
Here's a shot with all the major components mounted. Lots of wires
to tie down from the filament transformers and power transformer.
Notice the little circuit board and relay near the center of the amp.
That's a power supply time delay. It's made by
Sophia Electric and provides a 30 second delay to allow the filaments
time to heat before applying the high voltage.
I had to custom build the mounting bracket for the electrolytic
capacitor. It's made of 1/8" aluminum and bolted to the
aluminum channel which holds the motor run caps in place. I used those
and the other two subassemblies to mount
some components and to reduce the number of fasteners visible above the
chassis.
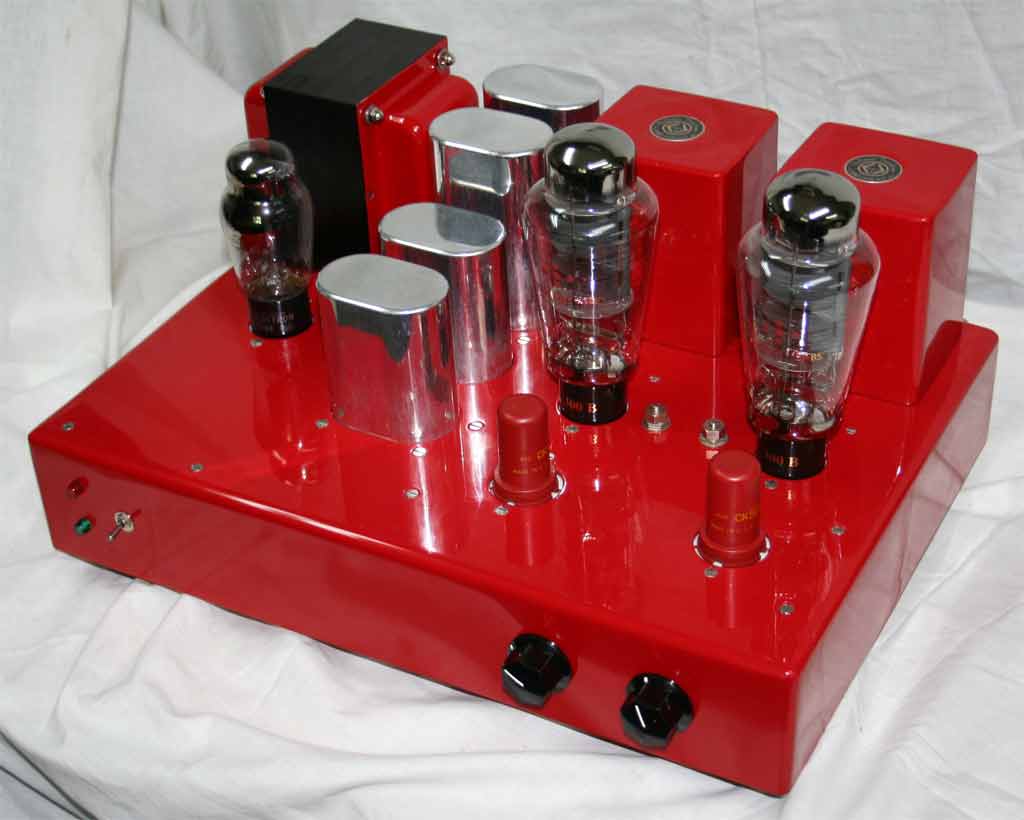
Here's another shot of the completed amp.
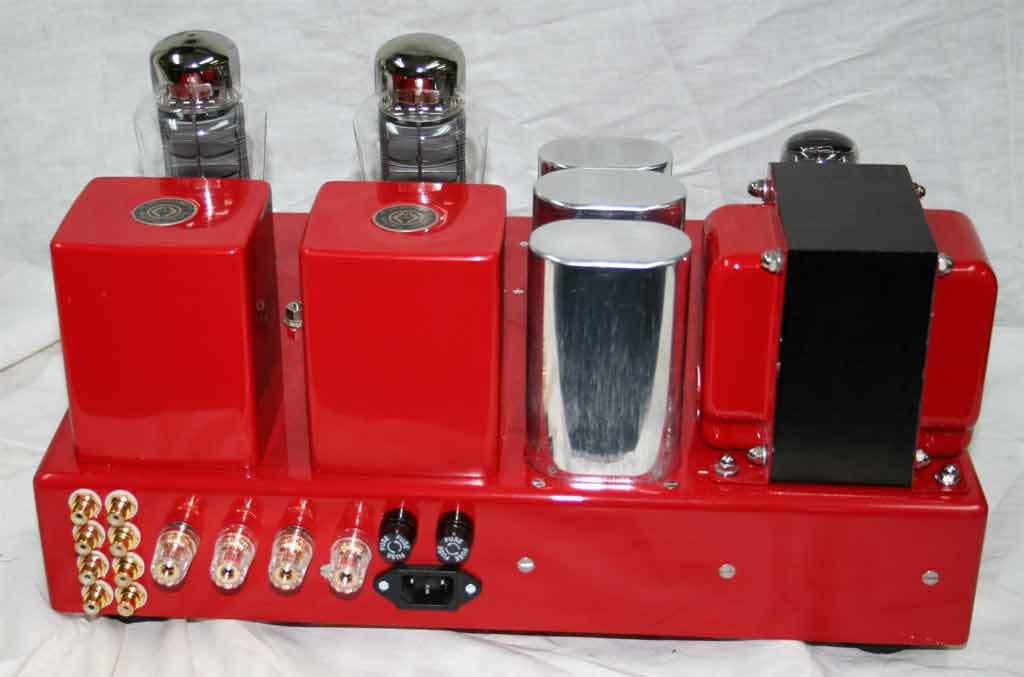
Here's a rear shot showing the input jacks, speaker binding posts,
IEC power connector and two fuse holders. I use a 1.5A slow-blow
mains fuse and a .5A fast blow fuse for the B+ to avoid damaging the
output transformers if a tube should run away.
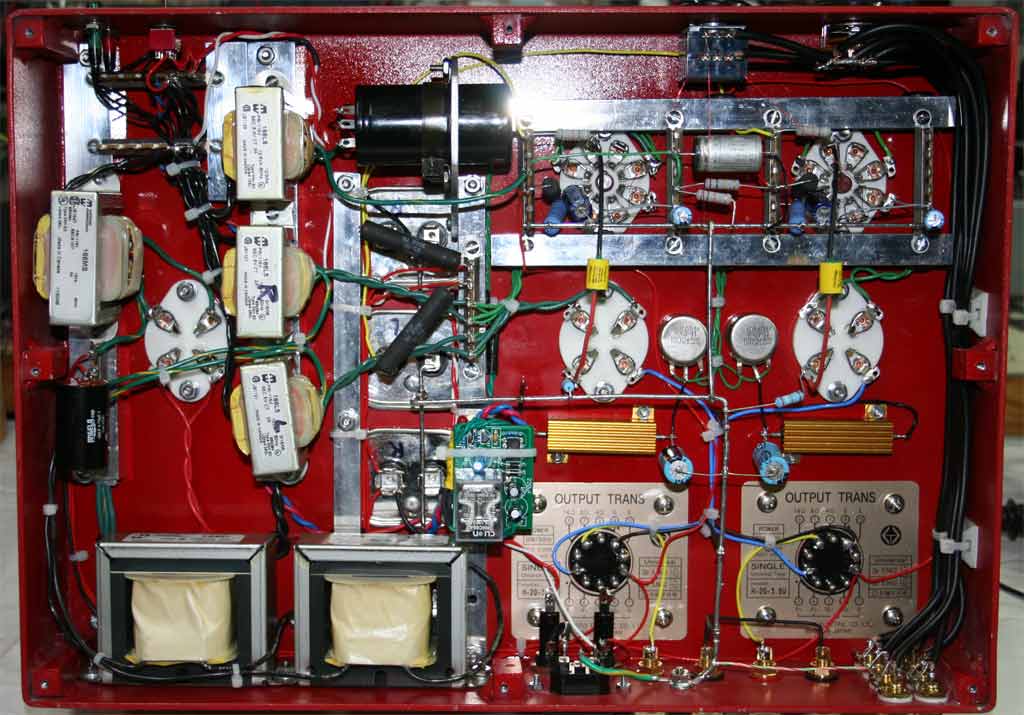
Here's a shot under the hood. The extra 2" front to back
made a difference in the available space in this amp. It's a lot more
open than the ones I've done before.
The transformers you see on the left are Hammond filament transformers
and chokes. The volume pot is an Alps 100K unit.
So, how does it sound? I must say that this is a very good amp.
It's very quiet, very little residual hum from the filaments
and it produces a clean 8 watts before clipping. Hal uses Klipsch Forte
speakers, so the power output should be ample. The amp plays
quite loudly on my Cornwalls.
I did some critical listening to my silver amp compared to this one,
since they are practically identical as to
components other than the output transformers. The only other
difference is the higher B+ voltage used on this amp due to a larger
first
capacitor in the power supply chain (4.7uF instead of 2.2uF on the
silver amp). I am unable to hear an appreciable difference between
the James 6123HS output transformers and the Hashimoto H-20-3.5U. They
are both very good quality transformers.
I bought the Hashimotos from Isao Asakura who is very
knowledgeable about his products and who provides a great service
in getting this nice iron into the USA.
Here's a link to the article from Sound Practices magazine that
inspired me to try this circuit.
WE91A.PDF
Here's a link to the schematic (finally!).
If anyone would like to see more detailed photos or if you have any
questions or comments, please
email me at rkoonce@dsityler.com.
I always enjoy email from other hobbyists.